PDF Privacy & Productivity
Mastering Fillable PDFs: Your Step-by-Step Guide on How to Make PDF with Fillable Fields
Quick answer
Here are the main things to remember when you're getting started with making your own fillable PDF forms. Keep these points in mind as you go through the process. Key Takeaways Choose the right software for your needs, whether it's a desktop program or an online tool. Think about what features you need and what…
Here are the main things to remember when you're getting started with making your own fillable PDF forms. Keep these points in mind as you go through the process.
Key Takeaways
- Choose the right software for your needs, whether it's a desktop program or an online tool. Think about what features you need and what you can spend.
- Plan your form's layout carefully. Make sure it's easy to understand and follow, with a logical order for all the questions.
- Use different types of fields like text boxes, checkboxes, and dropdowns to collect information in the best way possible.
- Customize your fields. Set which ones are required and add helpful tips so people know what to do.
- Always test your form thoroughly before sending it out to catch any mistakes or problems.
Understanding Fillable PDF Forms

So, what exactly is a fillable PDF form? Think of it as a digital document that lets you type directly into specific spots. Unlike a regular PDF that's just a picture of a document, a fillable one has interactive fields. You can type your name, check boxes, pick from lists, and even sign it digitally. It's like having a paper form, but way more convenient.
What Constitutes a Fillable PDF Form?
A fillable PDF form is essentially a PDF document that has been set up with interactive elements. These elements, or fields, are designed to accept user input. This could be anything from a simple text box for your name and address to more complex options like dropdown menus, checkboxes for selecting multiple items, or radio buttons for choosing just one option from a group. The key is that these fields are active and allow direct data entry, making the document functional rather than just a static display.
Benefits of Utilizing Fillable Forms
Why bother with fillable forms? Well, they really speed things up. Imagine sending out a survey or an application. Instead of printing, filling by hand, and then scanning or mailing it back, people can just type their answers right into the PDF. This means less chance of messy handwriting or missed information, leading to more accurate data collection. Plus, it cuts down on paper waste, which is always a good thing. They also look pretty professional, maintaining a clean layout no matter who is filling them out or what device they're using. It's a big step up from dealing with stacks of paper.
Here are some of the main advantages:
- Efficient Data Entry: Users can type directly into fields, making the process quick.
- Improved Accuracy: Reduces errors from manual transcription or illegible handwriting.
- Faster Workflows: Speeds up data collection and processing.
- Reduced Paper Waste: Environmentally friendly and cost-effective.
- Accessibility: Can be filled out on various devices, offering convenience.
- Secure Handling: Many tools offer ways to protect the data entered.
The Evolution of Interactive Documents
Documents haven't always been this smart. Back in the day, if you needed information from someone, you'd print a form, mail it, and wait. Then came digital documents, but they were mostly static. You could read them, but you couldn't really interact with them in a meaningful way. The development of fillable PDFs was a game-changer. It took the static nature of PDFs and added a layer of interactivity, allowing for data collection and form completion directly within the document. This evolution has made managing information much simpler and more organized, especially when you need to manage PDF files privately.
Fillable PDF forms bridge the gap between static documents and dynamic data collection, offering a practical solution for many everyday tasks.
From simple text fields to complex calculations, these forms have come a long way. They've transformed how we handle everything from job applications and registration forms to feedback surveys and internal company reports. It's all about making the process smoother for both the person creating the form and the person filling it out.
Selecting the Right Tools for Form Creation

Alright, so you've got this idea for a form, and you want it to be fillable. That's awesome! But before you start slapping fields onto a page, you gotta figure out what you're going to use to build it. It's kind of like picking the right hammer for the job, you know? Using the wrong one makes everything way harder than it needs to be.
Exploring Popular Software Options
There are a bunch of programs out there that can help you make these fillable PDFs. Some are super fancy and packed with features, while others are pretty basic and get the job done without a fuss. Adobe Acrobat Pro is probably the big name everyone knows. It's like the Swiss Army knife of PDF editing – it can do pretty much anything you throw at it, including making really complex forms with calculations and stuff. But, it can be a bit pricey if you're just starting out or only need it for occasional use.
Then you've got options like PDFescape, which is a handy online tool. You can actually edit PDFs right in your browser, which is pretty neat if you don't want to install anything. It's a good choice for simpler forms. Another popular route is using online form builders like JotForm. You build your form on their site, and then you can usually download it as a PDF. This is great if you're already used to online forms and want a straightforward way to get a fillable PDF out of it. You can even find tools that let you make any PDF fillable without starting from scratch.
Web-Based vs. Desktop Solutions
So, do you go with something you install on your computer, or something you use online? It really depends on how you work. Desktop software, like the full version of Adobe Acrobat, usually gives you more power and control. You can often work offline, which is a big plus if your internet connection is spotty. Plus, these programs tend to have more advanced features for tweaking every little detail.
On the flip side, web-based tools are super convenient. You can access them from any computer with an internet connection, and you don't have to worry about updates or installations. They're often more budget-friendly too, with many offering free tiers for basic use. The downside? You're usually dependent on your internet connection, and sometimes the features aren't quite as deep as with desktop software.
Here's a quick look at some general differences:
| Feature | Desktop Software | Web-Based Tools |
|---|---|---|
| Accessibility | Computer-specific | Any device with internet |
| Offline Use | Yes | No |
| Feature Depth | Generally higher | Varies, often simpler |
| Cost | Often higher upfront | Subscription or free tiers |
| Updates | Manual installation | Automatic |
Considering Budget and Feature Requirements
Before you get too excited about all the bells and whistles, take a moment to think about what you actually need. Are you just collecting names and addresses, or do you need complex calculations, digital signatures, and conditional logic? Be honest with yourself about the complexity of the forms you'll be creating.
- Simple Forms: If you just need basic text fields, checkboxes, and maybe a dropdown, a free or low-cost web-based tool might be perfect. You won't need to spend a lot of money.
- Complex Forms: For forms with calculations, advanced validation, or integration with other systems, you'll likely need a more robust desktop application or a premium online service.
- Frequency of Use: If you're making forms all the time, investing in a good desktop program might be worth it in the long run. If it's just a one-off project, a free online tool could save you cash.
Picking the right tool isn't just about finding the cheapest or the most feature-rich option. It's about finding the one that fits your workflow, your budget, and the specific job you need to do. Don't overcomplicate things if you don't have to, but don't shortchange yourself if you need powerful features.
Think about it like this: you wouldn't use a sledgehammer to hang a picture frame, right? Find the tool that's just right for your project. This decision upfront will save you a lot of headaches down the road when you're actually building your forms.
Designing Your Fillable PDF Layout
Okay, so you've picked your tool and you're ready to start building. This is where the magic happens – turning a flat document into something interactive and easy to use. Think of it like planning a room; you want everything to be in the right place, easy to find, and make sense when someone walks in. A well-designed form guides the user, making the whole process smoother.
Planning the Information Architecture
Before you even place a single field, take a moment to map out what information you actually need. What questions must be answered? What details are helpful but not strictly necessary? Jotting this down first stops you from adding fields later that you don't really need, which can clutter things up.
- List all the data points you want to collect.
- Group related information together (e.g., contact details, billing address).
- Decide which fields are absolutely required for the form to be submitted.
Ensuring Clarity and Logical Flow
People filling out forms are usually trying to get something done. They don't want to hunt for information or guess what you're asking. A logical flow means starting with simpler questions and moving to more complex ones, or grouping things by topic. A single-column layout often works best because it's easy to scroll through without getting lost. It also helps with accessibility features for all users.
Keep your labels short and to the point. If a field needs a specific format, like a date, make that clear right next to the field itself. Avoid jargon; use everyday language.
Creating a User-Centric Design
This is all about putting yourself in the shoes of the person filling out your form. How can you make it as painless as possible for them? This means clear instructions, obvious field labels, and making sure required fields are clearly marked. If you have a long list of options for a field, a dropdown menu is usually better than a bunch of checkboxes. It keeps the form looking cleaner. Remember, a form that's easy to complete is more likely to be completed accurately and submitted on time. You can even test how your form looks and feels before you send it out, which is a good idea for any important document, like when you need to sign a PDF electronically.
Here’s a quick look at how different fields can be used:
| Field Type | Best For |
|---|---|
| Text Field | Open-ended answers, names, addresses |
| Checkbox | Selecting multiple options from a list |
| Radio Button | Selecting only one option from a list |
| Dropdown Menu | Choosing one option from a long list |
| Date Picker | Entering specific dates |
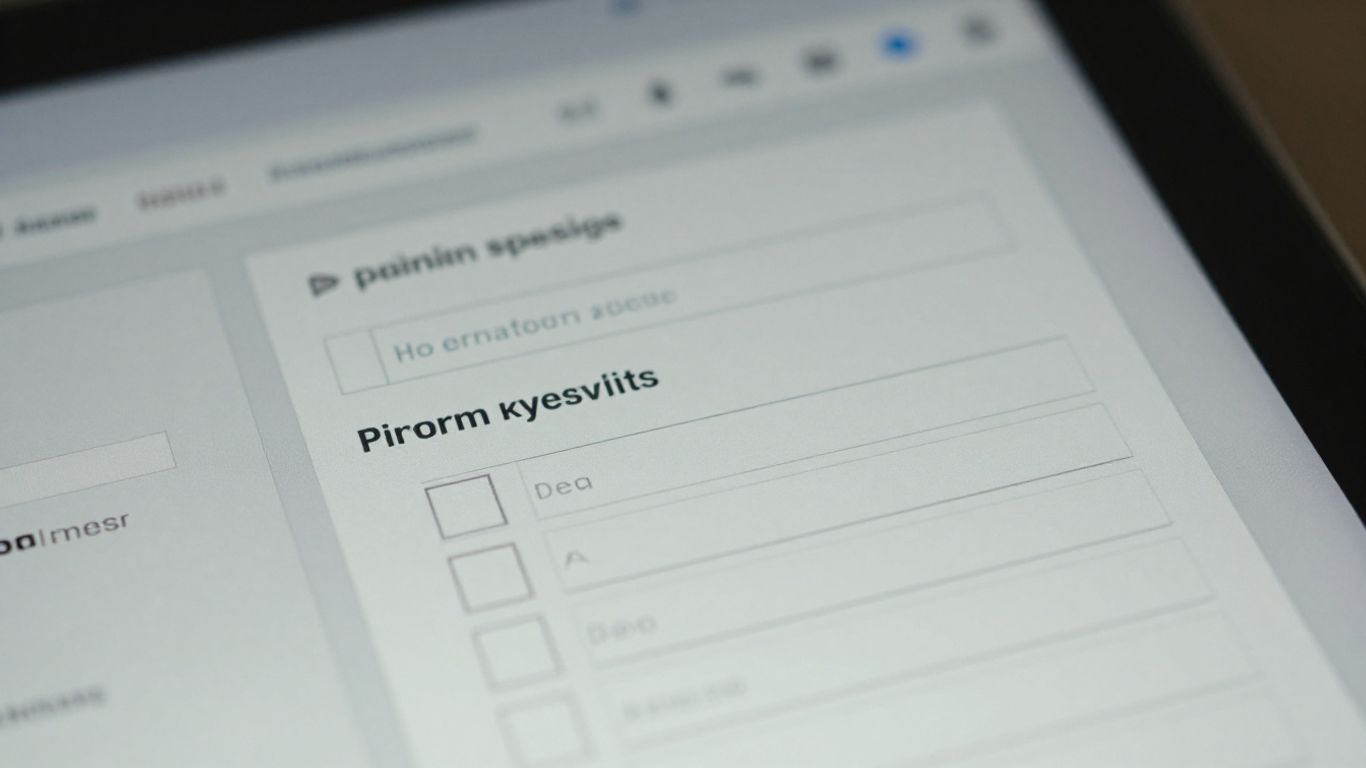
Incorporating Interactive Form Fields
Alright, so you've got your layout planned out, looking sharp and organized. Now comes the fun part: making it actually do something. This is where we add the interactive bits, the fields where people will actually type or click. Think of it like setting up the actual questions on a survey, but way more high-tech.
Adding Text Fields for Open Responses
First up, the most basic, but super important, are text fields. These are your go-to for anything where someone needs to write in their own words. Names, addresses, comments – you name it. When you're adding these, think about how much space someone might need. A small box for a first name is fine, but for a 'comments' section, you'll want to make it bigger, maybe even a scrollable text area if you expect a lot of writing. Most PDF editors let you set these up easily. You just draw the box where you want it, and boom, it's a place for text.
Utilizing Checkboxes and Radio Buttons
Next, we've got checkboxes and radio buttons. These are great for when you have a set list of options and people need to pick one or more. Checkboxes are like, 'select all that apply,' while radio buttons are for 'pick only one.' You know, like choosing your favorite color from a list – you can only have one favorite, right? Setting these up is pretty straightforward in most software. You'll usually group radio buttons together so the program knows they're a set.
Here's a quick rundown:
- Checkboxes: Perfect for multiple selections (e.g., 'Interests: [ ] Hiking [ ] Reading [ ] Gaming').
- Radio Buttons: Ideal for single selections (e.g., 'Preferred Contact Method: ( ) Email ( ) Phone').
- Grouping: Always group radio buttons so only one can be chosen at a time.
Implementing Dropdown Menus and Other Elements
Dropdown menus are another handy tool. They're like a compact list that expands when clicked, saving space on your form. This is awesome for things like state abbreviations or a long list of job titles. You just type in all the options, and the user gets a neat little menu to pick from. Beyond these, you'll find other elements like list boxes (similar to dropdowns but often show more options at once) and even buttons that can submit the form or reset it. Some advanced tools even let you add digital signature fields, which is pretty neat for official documents. If you're looking for a way to handle file uploads within a PDF, that's also an option in some professional software.
When adding fields, always think about the user experience. Keep it simple, logical, and don't overwhelm them with too many options or complicated layouts. A well-designed form is one that people can actually finish without getting frustrated.
For a wide array of free online tools that can help with PDF tasks, including form creation, you might want to check out FeelPDF's free tools. They focus on keeping your data private by processing files locally, which is a big plus.
Customizing Field Properties
Once you've placed your form fields, it's time to fine-tune them. This is where you make sure the form works exactly how you want it to and is easy for people to use. Think of it like setting the rules for each little box or button on your form.
Setting Required Fields
Making a field mandatory is pretty straightforward. You'll usually find this option in the field's properties. When you mark a field as required, the form won't let the user submit it until that specific field is filled out. This is super handy for getting all the important information you need, like an email address or a signature.
- Identify essential information: Decide which fields absolutely must be completed.
- Access properties: Right-click on the field and select 'Properties' (or similar).
- Check the 'Required' box: Look for an option to make the field mandatory.
- Inform the user: Sometimes, you can add a note or use formatting to show which fields are required.
Configuring Data Formats
This part is all about making sure the data entered is in the right format. For example, if you have a field for a phone number, you can set it up so that only numbers and maybe hyphens are accepted. This cuts down on errors and makes the data cleaner when you get it back. You can set formats for dates, numbers, percentages, and even custom formats.
Here's a quick look at some common formatting options:
| Field Type | Common Formats |
|---|---|
| Numbers | Decimal, Currency, Percentage |
| Dates | MM/DD/YYYY, DD-MM-YY, Month DD, YYYY |
| Phone Numbers | (XXX) XXX-XXXX, XXX-XXX-XXXX |
| Email Addresses | Standard email pattern validation |
Adding Tooltips for Guidance
Sometimes, a field might need a little explanation. That's where tooltips come in. When a user hovers their mouse over a field, a small box can pop up with extra instructions. This is a great way to guide users without cluttering the form itself. It's like a little hint system built right into the form. You can add these tips when you're editing the field properties, often in a section labeled 'Appearance' or 'Options'.
Making fields required or setting specific data formats helps prevent errors before they happen. It guides the user and ensures the data you collect is usable. Don't skip this step if you want a smooth data collection process.
Adjusting these properties makes your forms much more robust and user-friendly. You can find these settings in most PDF editing software, like Adobe Acrobat's 'Prepare Form' tool. If you're looking for a free online option to fill forms, Fill PDF Forms is a good place to start, though customization options might be more limited there.
Testing and Distributing Your Fillable Form
So, you've put in the work, designed your form, and added all those handy interactive fields. Awesome! But before you send it out into the wild, there are two super important steps: testing and distribution. Skipping these is like baking a cake and forgetting to check if it's actually cooked through – not a good look.
Thoroughly Testing Field Functionality
This is where you play detective. You need to go through your form with a fine-tooth comb. Seriously, fill it out yourself, and then fill it out again. Try different scenarios. What happens if someone types a really long answer? What if they leave a required field blank? Does that little calculation you added actually add up correctly? You want to catch any glitches or weird behavior before anyone else does. It’s about making sure the form works smoothly for everyone who uses it. You can use the Pan tool in Adobe Acrobat to check if fields are properly recognized.
- Test every single field: Make sure text fields accept input, checkboxes toggle, radio buttons select, and dropdowns open.
- Check required fields: Verify that users are prompted if they try to submit without filling in mandatory information.
- Validate data formats: If you set up specific formats (like dates or numbers), confirm they work as expected and flag incorrect entries.
- Review calculations: If your form does any math, double-check the results.
Think of testing as a quality check. It’s not just about finding bugs; it’s about making sure the form is easy and intuitive to use. A clunky form can frustrate people and make them less likely to complete it.
Ensuring Cross-Platform Compatibility
People use all sorts of devices and software these days. Your form needs to play nice with most of them. This means checking how it looks and functions on different operating systems (Windows, macOS) and with various PDF readers. While Adobe Reader is super common, some folks might use built-in browser viewers or other PDF software. You don't want your carefully crafted form to look like a jumbled mess on someone's computer. Making sure your form is accessible across different platforms is key to reaching the widest audience possible. You can find practical guides on document handling at FeelPDF.
Strategies for Effective Distribution
Alright, your form is tested and ready to go. Now, how do you get it to the people who need it? There are a few ways to go about this:
- Email: This is a classic for a reason. You can send it directly to specific individuals or a group. Just attach the PDF to your email.
- Website Upload: If you have a website, uploading the form there makes it easily accessible for anyone visiting. You can link to it from relevant pages.
- Cloud Storage Links: Services like Google Drive or Dropbox let you share a link to the file. This is handy if you want to share it widely without attaching it to emails.
- Internal Systems: For businesses, you might have an internal portal or shared drive where forms are stored.
No matter how you distribute it, make sure people know where to find it and how to use it. A little note or instruction can go a long way. The goal is to make the process of getting and filling out your form as simple as possible.
Conclusion
Making fillable PDF forms is a really useful skill these days. It helps you get information from people without a lot of hassle and keeps things looking neat and professional. By picking the right tools, planning your form well, adding the interactive bits, and testing everything out, you can create forms that work great for whatever you need. Remember, the goal is to make it easy for people to fill out your form, so keep it clear and simple.
Frequently Asked Questions
What exactly is a fillable PDF form?
Think of a fillable PDF form like a digital paper form you can type on. Instead of printing it out and writing on it, you can type your answers right into the boxes on your computer or tablet. It's a way to collect information without needing to print anything.
Why should I use fillable forms instead of regular PDFs?
Fillable forms make collecting information much simpler and faster. People can type their answers directly, which means less chance of messy handwriting or mistakes when someone has to re-type it. Plus, your forms will look neat and organized every time.
Can I make a fillable PDF without buying expensive software?
Yes, you can! There are free online tools and even some free desktop programs that let you add fillable fields to your PDFs. You don't always need fancy software to get the job done. Some tools can even automatically find places to add fields.
What kinds of fields can I add to a PDF form?
You can add different types of fields depending on what you need. There are text boxes for typing answers, checkboxes for picking one or more options, radio buttons for choosing just one option from a list, and dropdown menus to select from a list of choices. You can also add places for signatures.
How do I make sure people fill out the form correctly?
You can set certain fields as 'required,' meaning people can't submit the form without filling them in. You can also set up rules for how information should be entered, like making sure a date is in the right format. Adding little pop-up tips (tooltips) can also help explain what you need.
What's the best way to test my fillable form?
The best way to test is to try filling it out yourself on different devices or using different PDF reader programs, like Adobe Reader. Click on every field to make sure it works, check that required fields are actually required, and see if the tab order (where you jump next when you press tab) makes sense. Get a friend to test it too!